Quick Answer: This blog offers instructions on how to file and pay a sales tax return in Colorado using form DR 0100. Be certain to choose the correct version of this form as there are older versions still available. Note that these instructions only relate to filing a sales tax return in the state of Colorado. Please consider other home-rule sales tax obligations separately.
Do You Need to File a Colorado Sales Tax Return?
Once you have an active sales tax permit in Colorado you will need to begin filing sales tax returns. Not sure if you need a permit in Colorado? No problem. Check out our blog, Do You Need to Get a Sales Tax Permit in Colorado? Also, If you would rather ask someone else to handle your Colorado filings, our team at TaxValet can handle that for you with our Done-for-You Sales Tax Service. We specialize in eliminating the stress and hassle of sales tax.
How to Sign In and File a Return using Colorado’s Website
We will begin with simple step-by-step instructions for logging on to the website in order to file and pay your sales tax return for Colorado.
Step 1: Follow this link, https://www.colorado.gov/revenueonline/_/, to come to this screen:
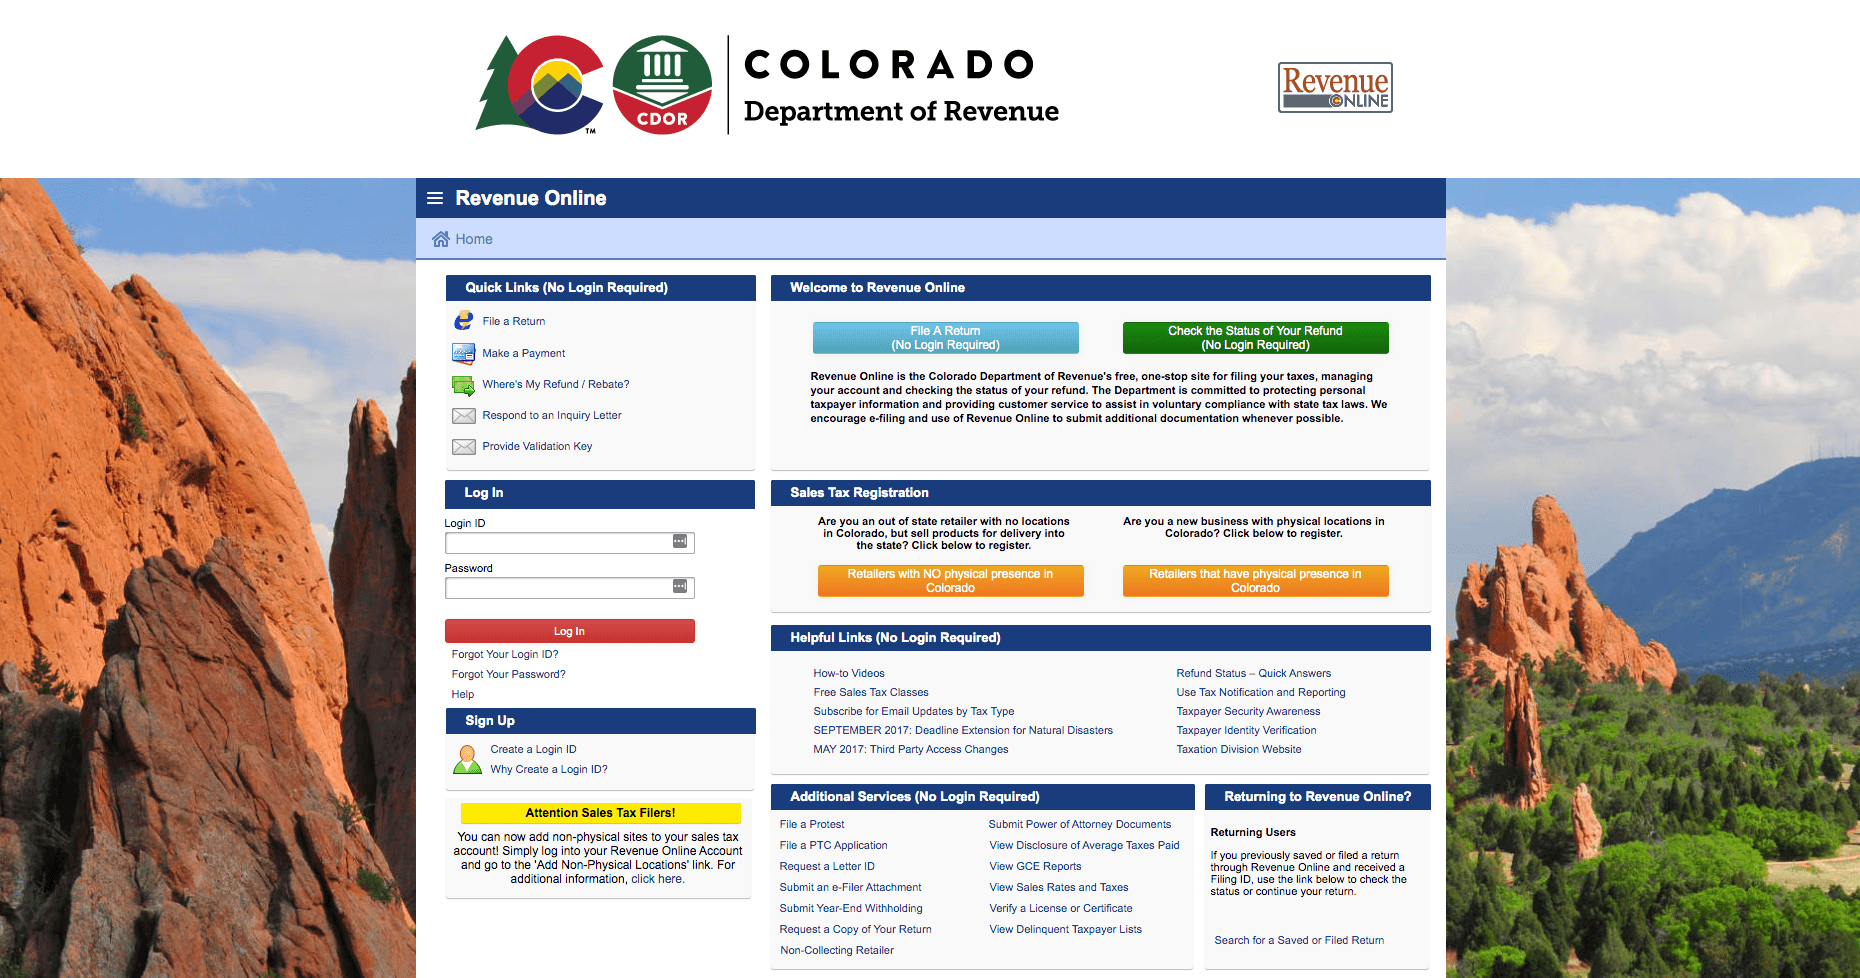
Step 2: Sign in with your username and password.
If you do not have a username & password then your first step is setting that up. Your username and password are generally created when you submit registration paperwork for a sales tax permit. If you are not interested in doing the work of getting the permit or a state login yourself, TaxValet can handle that for you with our Sales Tax Permit Registration Service.
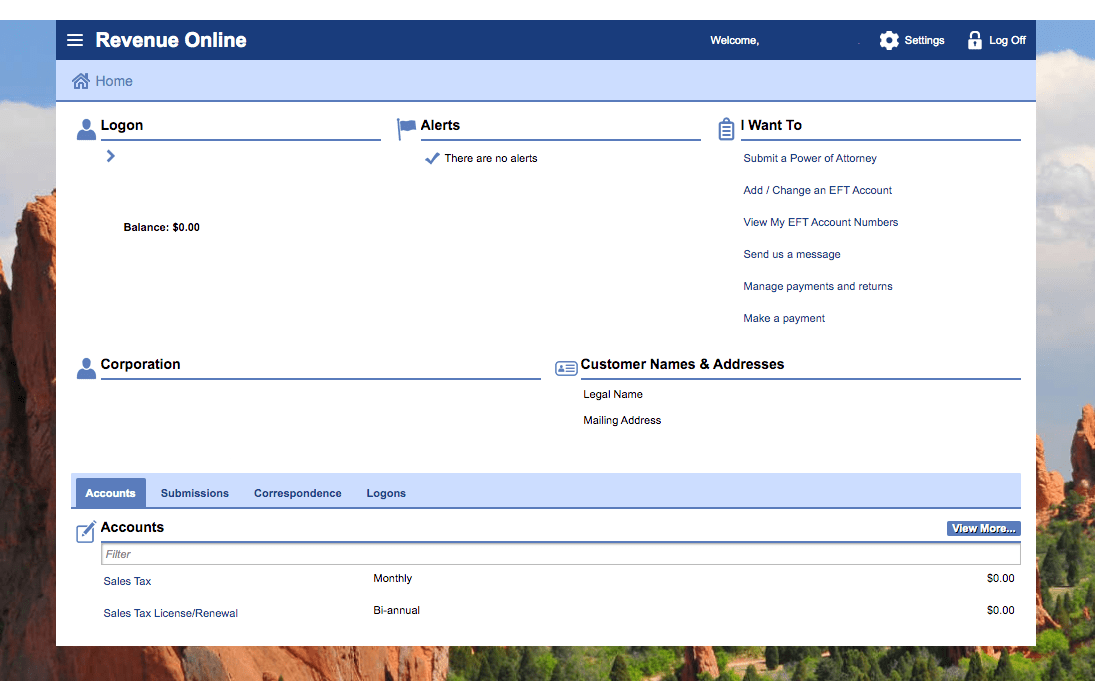
Step 3: You will be directed to your dashboard for that state. Once you come to the dashboard, select the account for which you want to file a return by clicking the “Sales Tax” button to the left of the correct account.
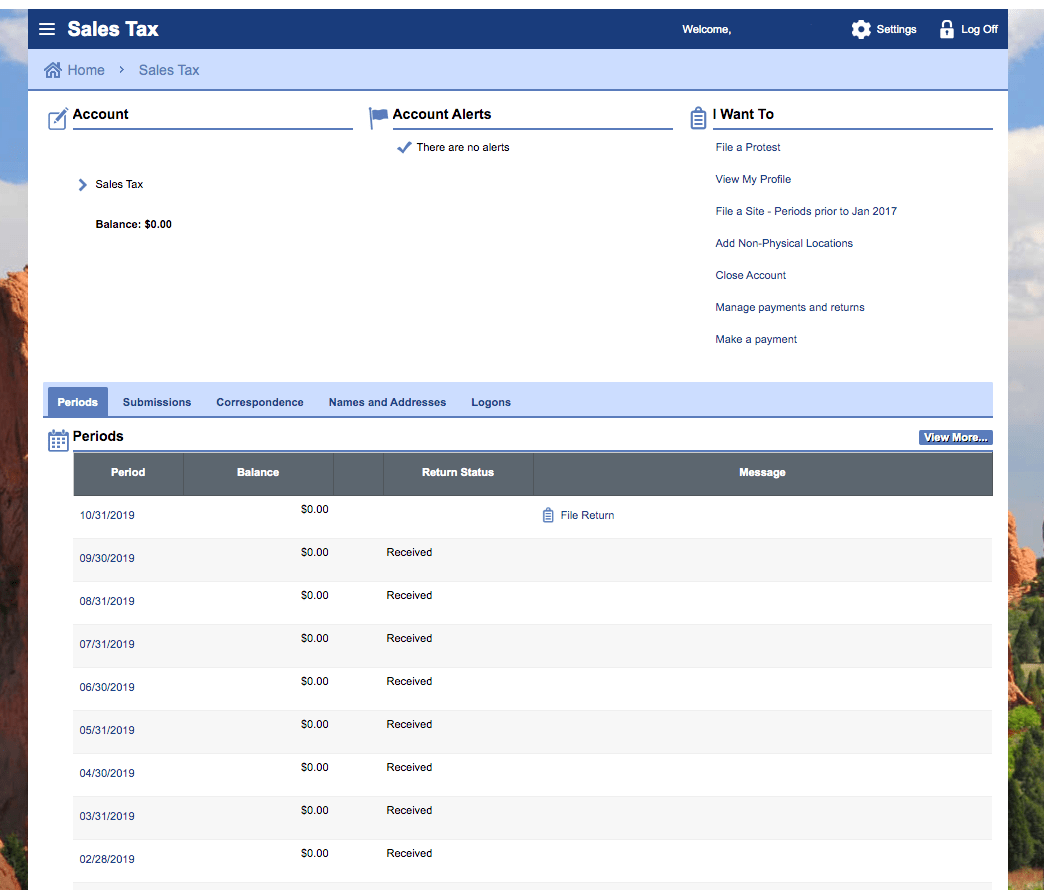
Step 4: Next, you will be directed to this page. Filing a Colorado return has a few quirks. This is where I cover one of them. At this step, find “Add Non-Physical Locations” under “I Want To”. This will take you to the page where you can be sure that you have all of the jurisdictions added before you begin the return.
This is a crucial step. Once you start the return, you cannot go back and add these non-physical locations.
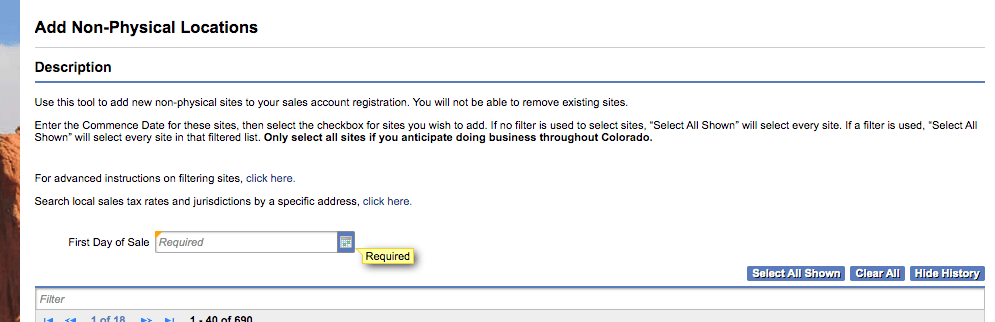
Next, you should see a screen that looks like the one below. Enter the first day of the sale for the period for which you are filings. Now click the “Select All Shown” button and scroll all the way to the bottom of the page to select “Next.”
You now want to confirm that you want to add these locations to your return. The site prompts you to enter your password to complete this process.
After you are finished adding the non-physical locations, you should navigate back to the screen where you can see the periods available to file.
(Note: It is never a good idea to press the back arrow on the browser to navigate around any state sales tax portal. Always be sure you use the appropriate navigation buttons on the site.)
Step 5: At this screen, click “File Return” for the period that you wish to file. Now you will see this screen below. If you are uploading a spreadsheet, this is where you would select that option. Otherwise, select the “File a Retail Sales Tax Return” button.
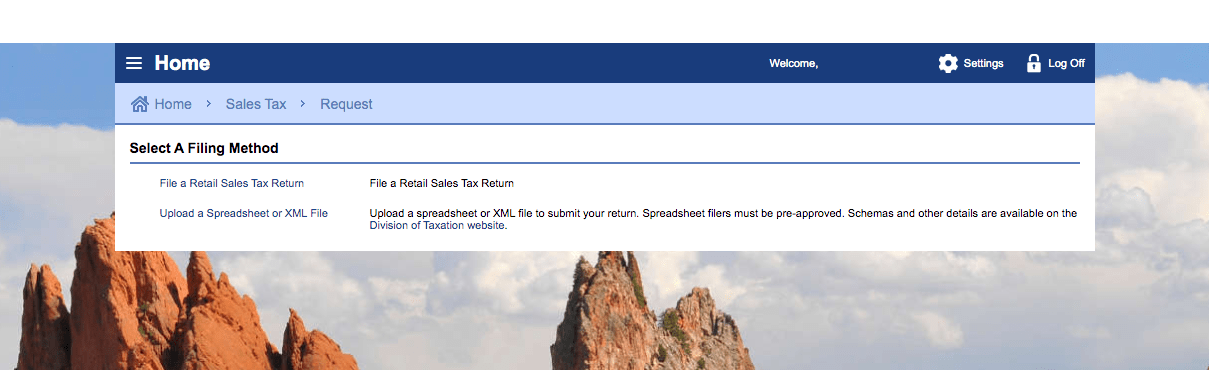
This will bring you to the screen shown below where you will spend most of your time.
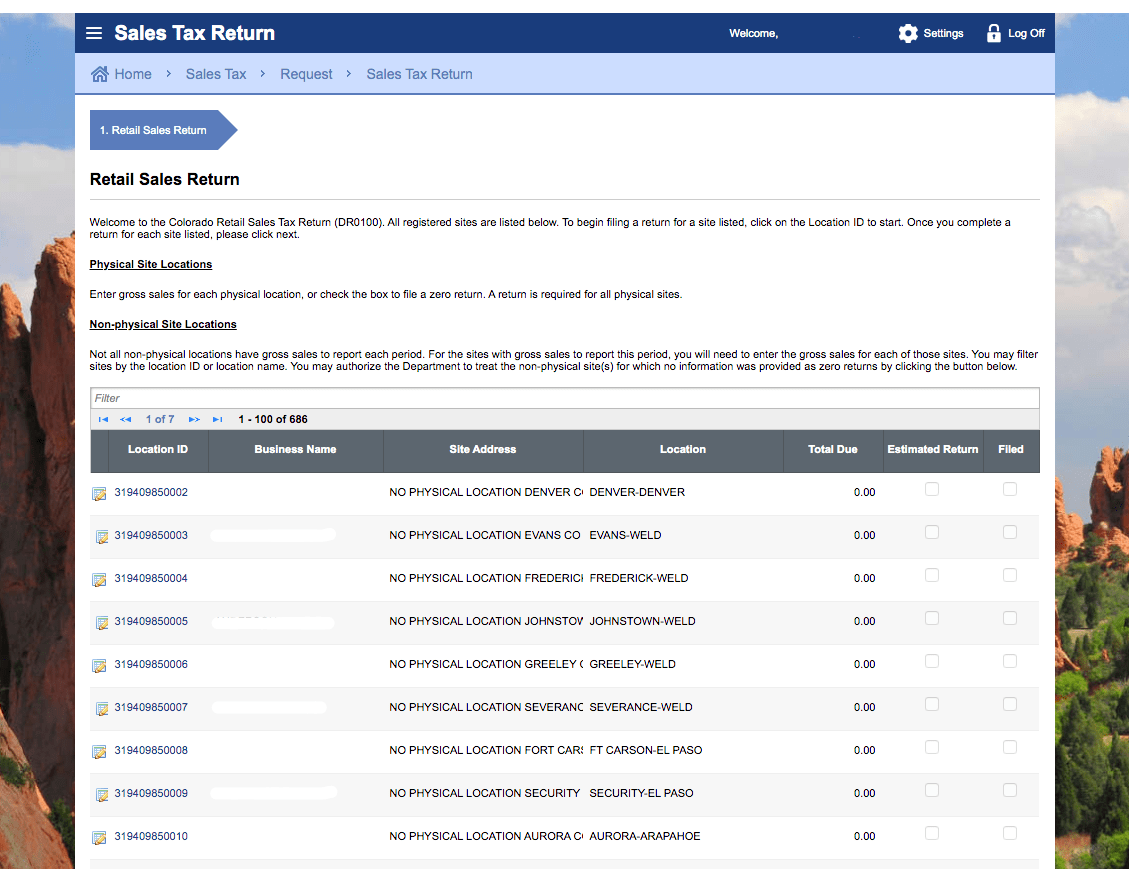
You now need to find each jurisdiction where you have sales and click into them individually. You will need to know the gross sales, deductions (if any), and the excess tax collected that you will be remitting to the state instead of the jurisdiction.
When you click into each non-physical location, you should see a screen that looks like this:
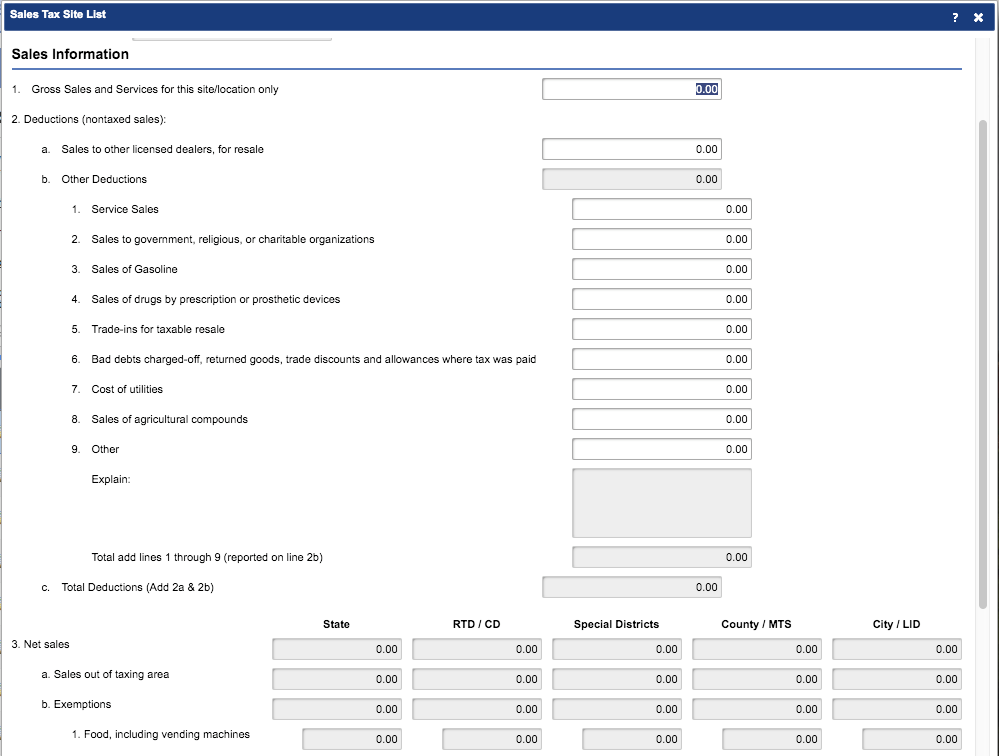
Key in the gross sales for that location only at the top. Key in the deductions underneath (if you have any). Now scroll all the way to the bottom and find the excess tax collected box.
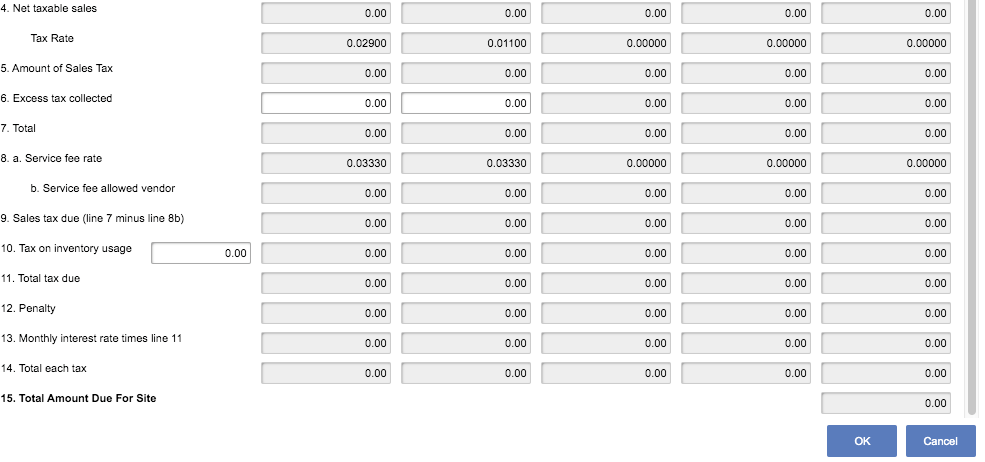
You can see it above on the left side of the screen. After you enter the appropriate information for that location, the total amount due for that site will auto-calculate. Click “OK”. Now, you just need to do that for each location.
As a tip, it is much easier to use the search bar to find the location that you need. Searching for the name of the location is easiest. An example would be “DENVER-DENVER” or “EVANS-WELD”.
Note that if you have a physical location in Colorado, your locality will be defined as a “physical location” and not a “non-physical location”.
Sales tax can be quite confusing. If you find yourself scratching your head over this return, you might consider signing up for our Done-for-You Sales Tax Service.
Step 6: Okay, let’s regroup. At this point, your head is probably spinning. So you should have all of your sales entered for each location. You should have also accounted for any deductions that you had in each of the locations. Furthermore, you should have keyed in any excess tax collected that you are remitting to the state for each of these locations.
Now scroll all the way to the bottom of the page until you see the blue button that looks like this:
Select this button to file all the remaining locations as $0 returns. You must complete this step to go on.
You will now see the summary of the information that you just entered.
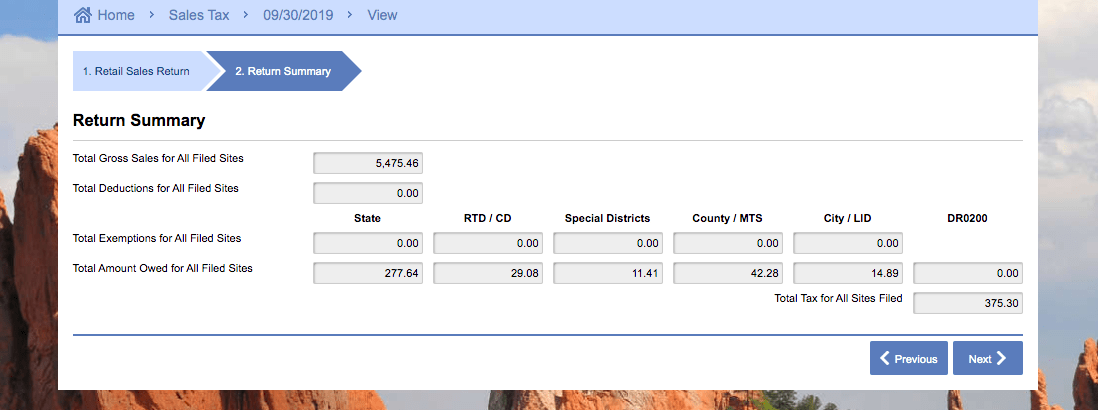
If all of this information looks correct, you’re almost finished! If it does not look correct, you will need to go back through and double-check your data entry. Once all the data is verified, click “Next”.
You will now be shown the “Special District Sales” screen.
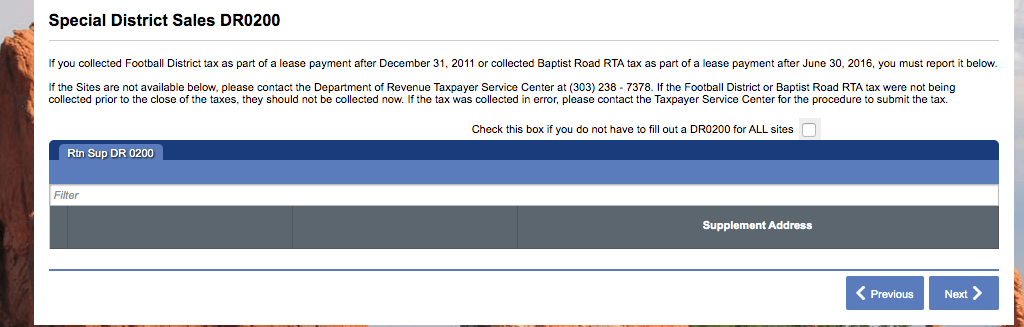
This likely doesn’t apply to you, but be sure to read it through just to be sure. Check the box if it does not apply to you, then click “Next”.
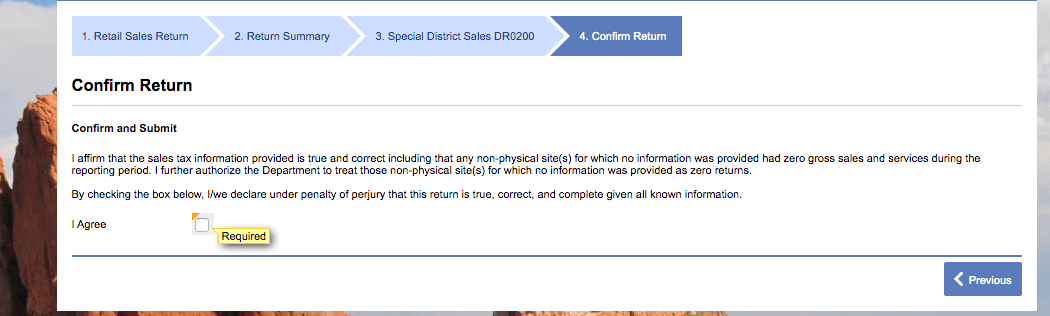
Step 7: Now you are on the final page! Just confirm and submit and you are finally finished.
How to Pay Colorado Sales Tax
After you have reviewed and submitted your return, be sure to proceed with electronic payment. If you wish to pay online, be sure to select the “EFT Payment (No Fee)” option on the left at this step.

You will be redirected to a new page entirely. To pay your Colorado return you will need to be sure to register properly. You will need an EFT ID number and password separate from your login password. If you already registered, just follow the prompts, making sure to set the appropriate payment date. Nobody wants to pay late fees!
Once you have processed your return and payment, be sure to save all documentation.
Now you are officially done filing and paying your State of Colorado sales tax return!
As a final step, it is always a good idea to verify that the correct amount of funds was withdrawn from your bank account on the correct day.
Things to Consider After Filing a Sales Tax Return in Colorado
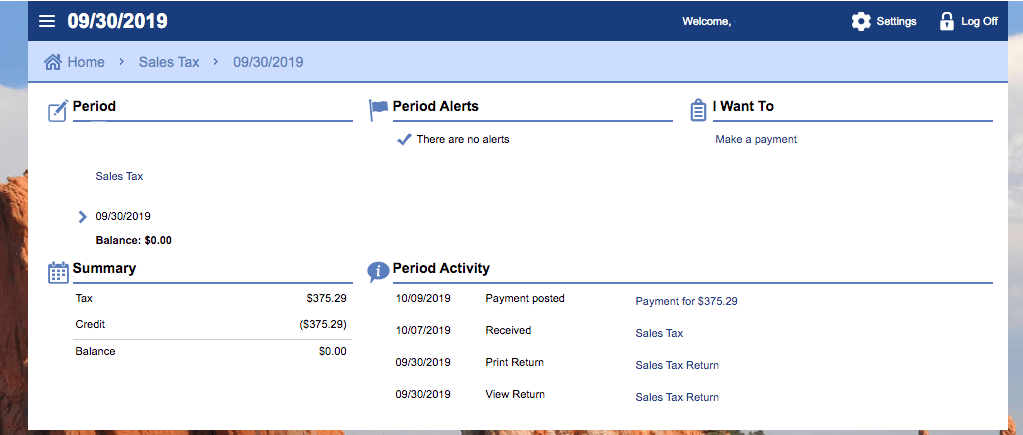
If you forgot to print or save a copy of your sales tax return, no need to worry. You can easily go back into the period to view and/or print the return that you just filed. Go back to the dashboard and click into the period that you just filed. Under “Period Activity” click “Sales Tax Return” off to the right of the “Print Return” option. Be aware that the Colorado return is a huge file to download. It may take several seconds to download fully.
How to Get Help Filing a Colorado Sales Tax Return
If you are stuck or have questions, you can contact the state of Colorado directly at (303) 866-4622 between 8:00 am and 5:00 pm MST. You can also find additional resources at the Colorado Department of Revenue (DOR) website. The Colorado DOR has also made a few helpful videos on filing a sales tax return. Those videos can be found here: https://www.colorado.gov/pacific/tax/sales-tax-instructions-and-forms.
Home Rule Cities in Colorado
In addition to state sales tax, Colorado also imposes city sales tax. You can remit some of the city tax directly to the state, however, some cities, called “Home Rule” cities, administer their own sales tax collections. If you have nexus in a “Home Rule” city, you will need to apply for a sales tax permit directly from the city. You will also be required to remit taxes directly to the city.
For more information about Home Rule cities, see the Colorado Sales Tax Guide.
If instead, you are looking for a team of experts to handle your sales tax returns for you each month, you should check out our Done-for-You Sales Tax Service. Feel free to contact us if you’re interested in becoming a client!
Disclaimer: Nothing on this page should be considered tax or legal advice. Information provided on this page is general in nature and is provided without warranty.
Copyright TaxValet 2023 | Privacy Policy | Site Map