Quick Answer: This blog gives instructions for how to file and pay sales tax in New York with the ST-100 form, a return commonly used by out-of-state sellers. The sales tax payment will happen at the time of filing the return.
For a comprehensive overview of New York sales tax, including the latest rules and regulations, visit our New York Sales Tax Guide. This resource provides all the information you need to ensure compliance and understand your tax obligations in the state.
Do You Need to File a New York Sales Tax Return?
Once you have an active sales tax permit in New York, you will need to begin filing sales tax returns. Not sure if you need a permit in New York? No problem. Check out our blog, Do You Need to Get a Sales Tax Permit in New York?
Also, If you would rather ask someone else to handle your New York filings, our team at TaxValet can handle that for you with our Done-for-You Sales Tax Service. We specialize in eliminating the stress and hassle of sales tax.
How to Sign-in and File a Return on New York’s Website
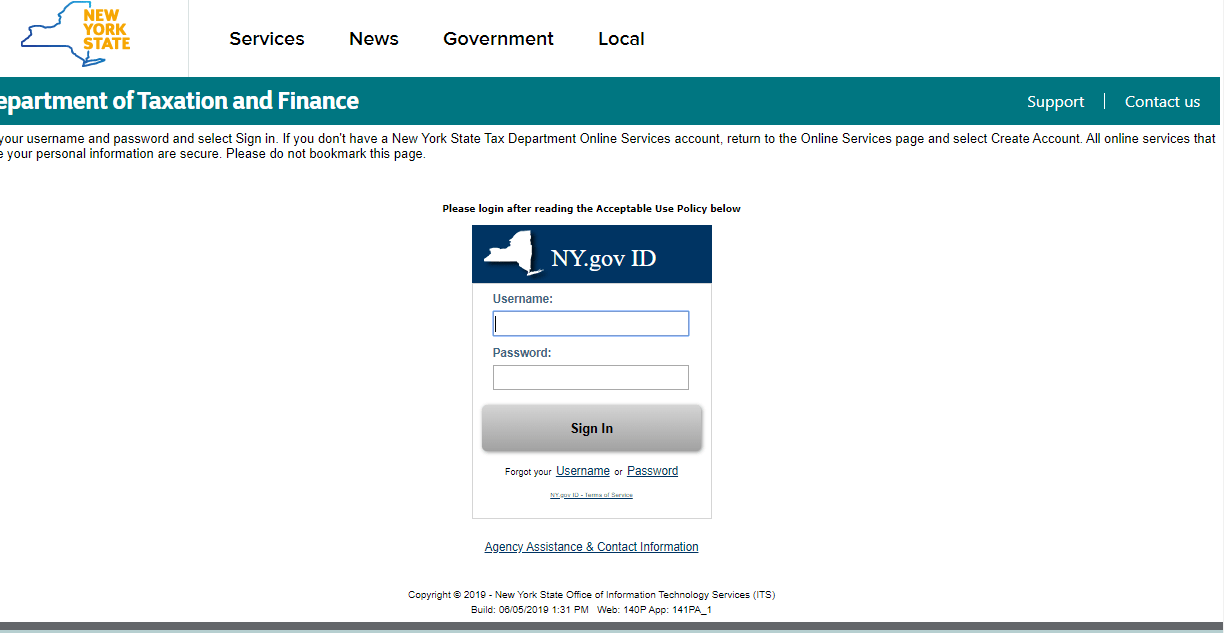
Step 1: The first step in filing your New York sales tax return is to log into
https://www.tax.ny.gov/online/bus.htm. Click “LOG IN.”
If you do not have a username and password, you need to click on “CREATE ACCOUNT” and then follow the instructions for signing up.
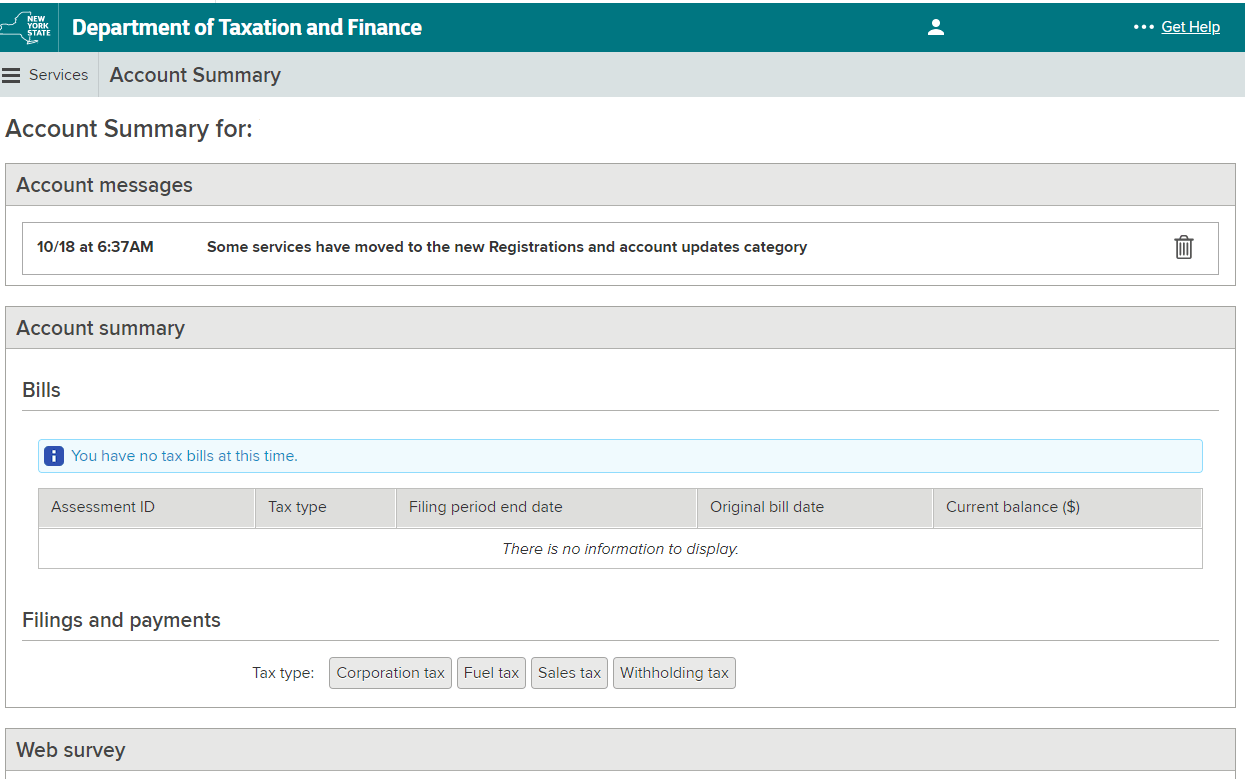
Step 2: You should now be on your homepage. Think of this page as your home base. You can always come back to this page if you get lost. Start by selecting the type of tax you want to file returns for. In this case, we would choose “Sales tax.”
Step 3: Click on “File Return” for the time period you want to file.

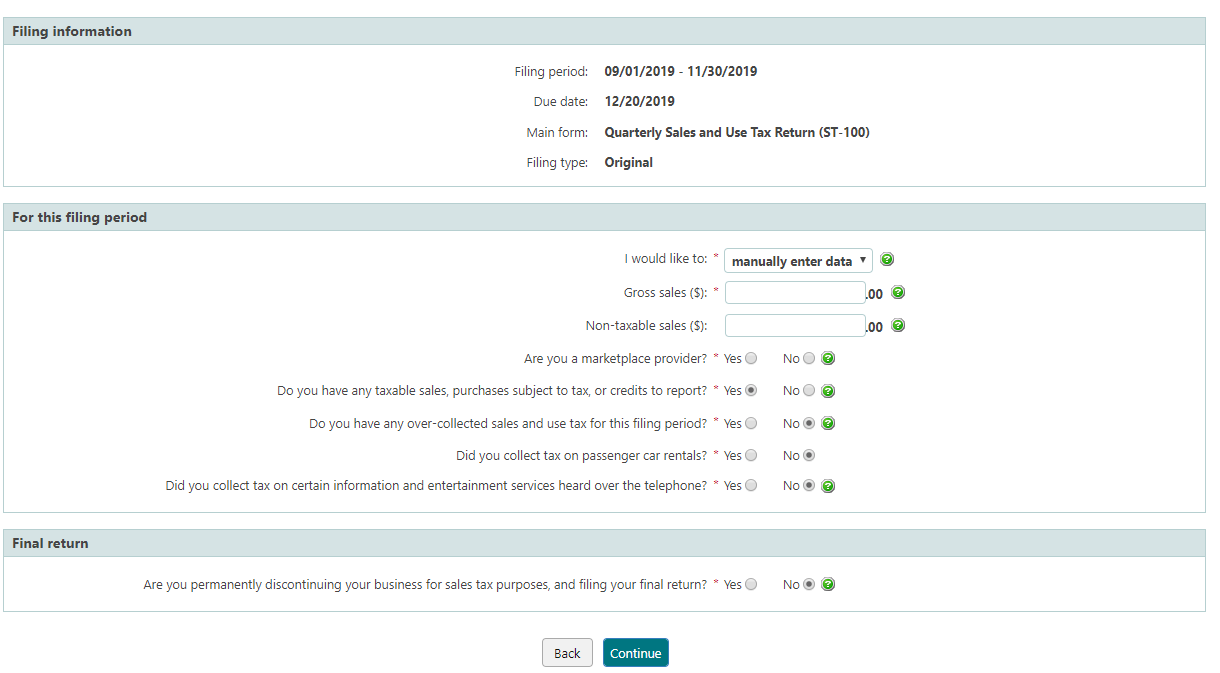
Step 4: To start filing your sales tax return, answer the questions below and select “Continue.” To save the data you entered and return to it later, select “Save & Exit.” “Save & Exit” is located in the upper right-hand corner of each page after you select the filing period.
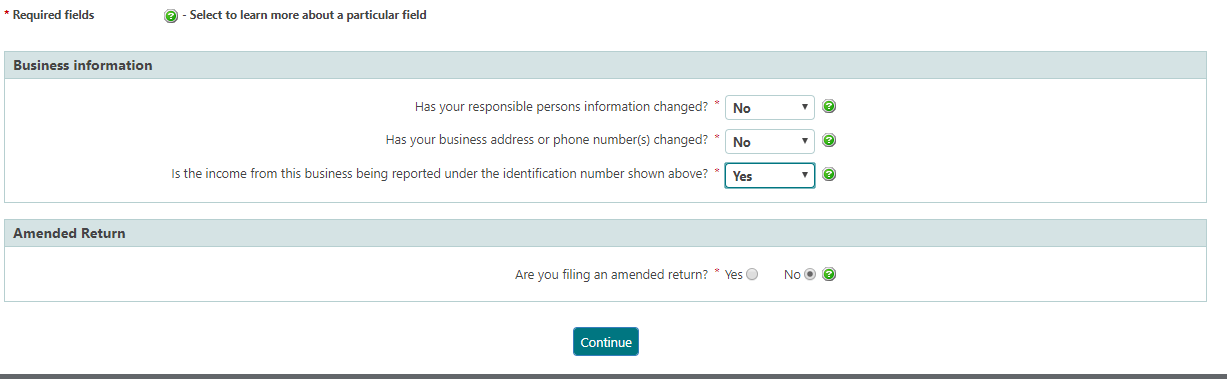

Step 5: On the next screen, complete the requested information and select “Continue.” If you make a mistake, select “Back” to correct the information.
Note: If you have marketplace sales they should be included in your gross sales and also included in your non-taxable sales.
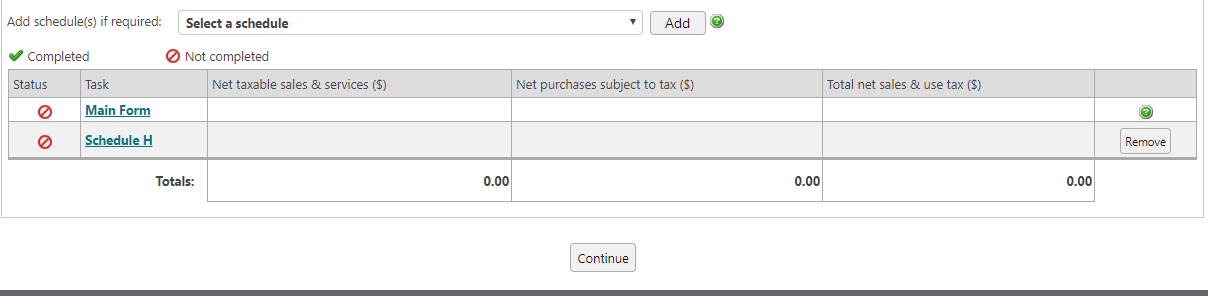
Step 6: Choose a task to complete by selecting a link in the “Task” column.
A task is complete when a green check-mark displays in the status column.
If you do not see the schedule that you are required to file in the “Task” column, then choose the schedule from the drop-down menu and select “Add.” To remove a schedule and any data reported on it, select the trash icon.
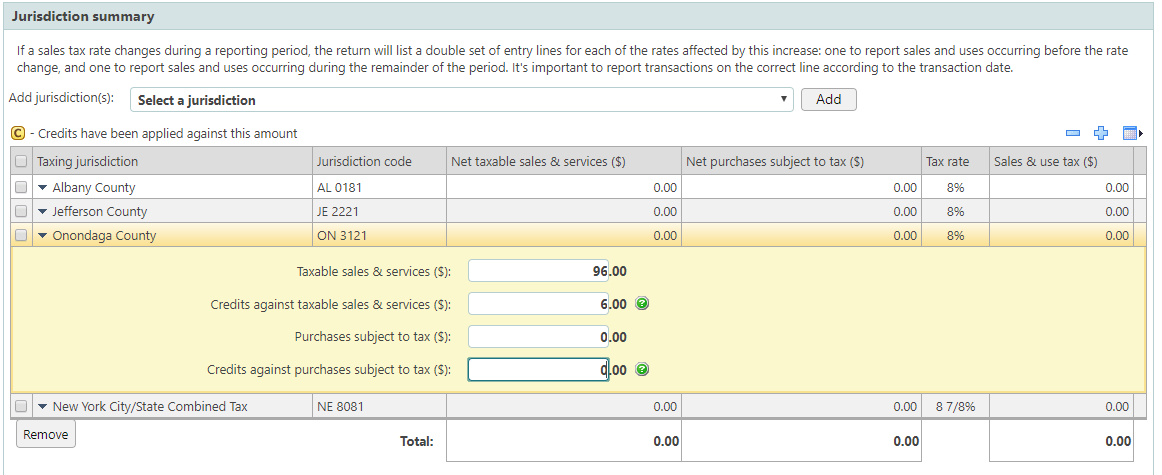
Step 7: Click on the “Main Form-Jurisdiction Summary.” The list will include jurisdictions from your previously filed returns. To customize your list of taxing jurisdictions, choose a jurisdiction from the drop-down menu and select “Add.” To remove a jurisdiction, simply check the box next to the jurisdiction(s) and select “Remove.” Be careful to select “Remove” only if you are sure you want to delete the selected jurisdiction(s) and any data reported on them.
Select a taxing jurisdiction to display the data entry fields and begin entering your data. Use the icons to change the view of the data entry fields. When all data has been entered select “Calculate.”
Select “Return Summary” to make adjustments within your return. Select “Continue” when the jurisdiction summary is complete.
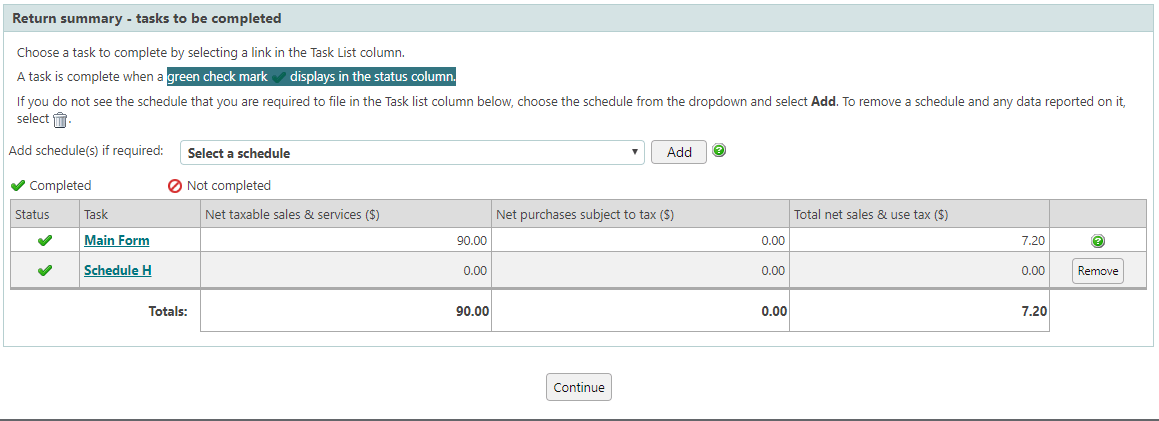
Step 8: Once you have finished entering your data, your return summary should have all green checkmarks in the status column. If this is correct, click “Continue.”
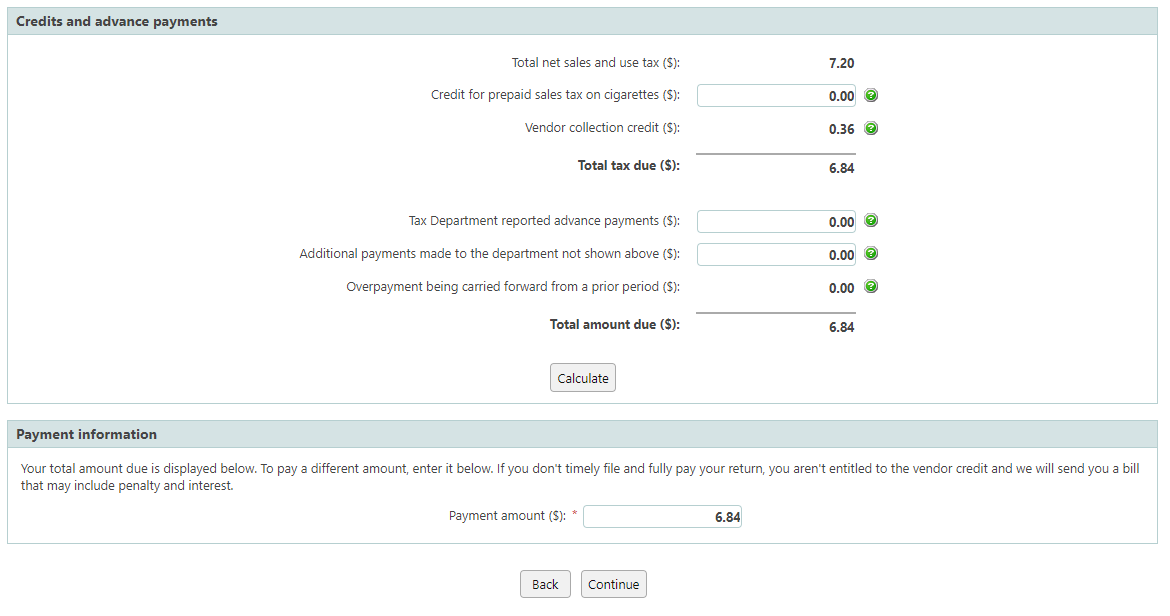
Step 9: You should now see the tax due details. This page displays any advance payments that you’ve made or overpayments from a prior period that you’re carrying forward. Select “Calculate” to calculate totals. Select “Continue” when all of the information is complete.
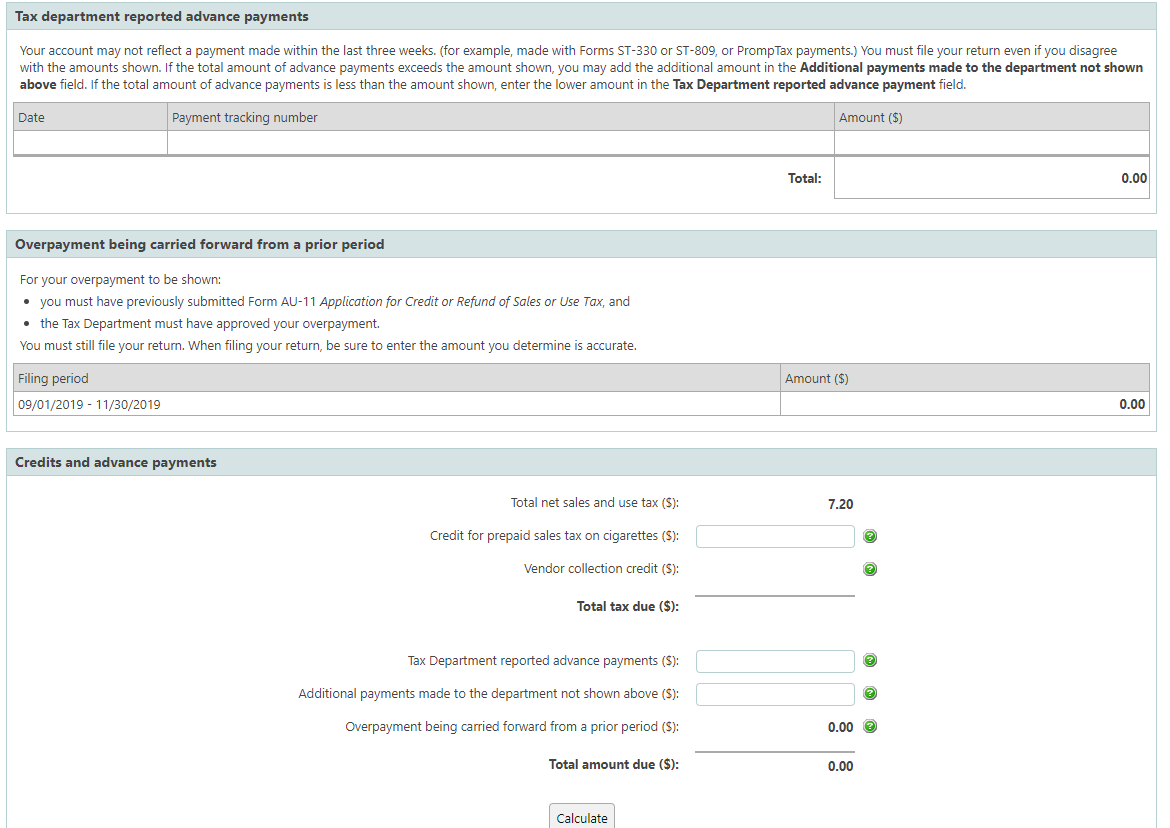
Step 10: You are now ready to make your payment.
**Before you continue, please review and verify the total amount due or over-payment amount indicated on the return. If the amount is correct, select “Continue” again.
Follow the payment instructions below to pay and submit your return.
How to Pay New York’s Sales Tax
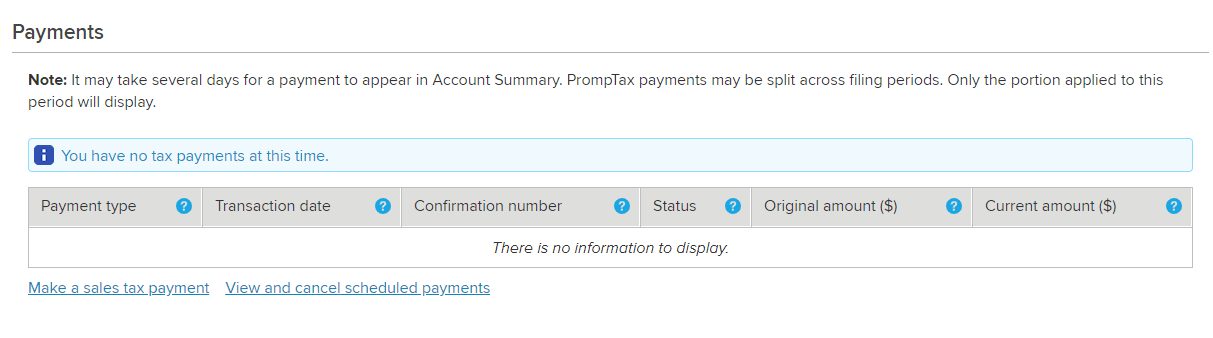
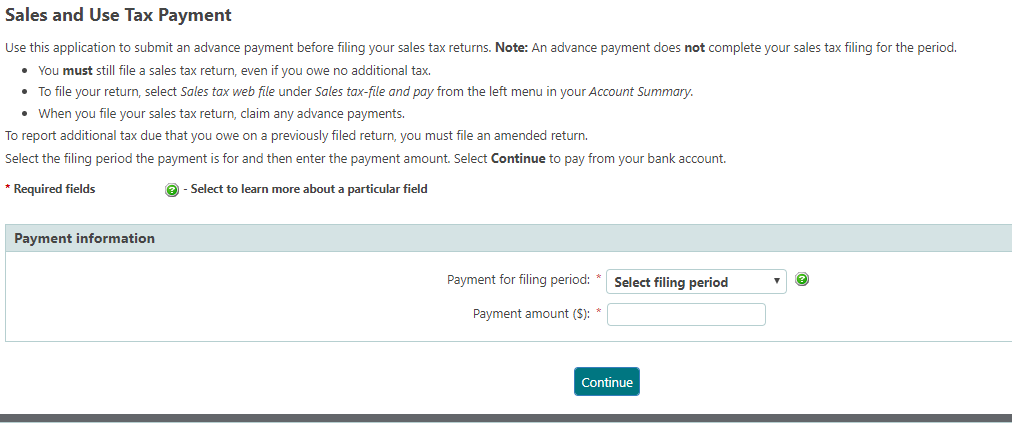
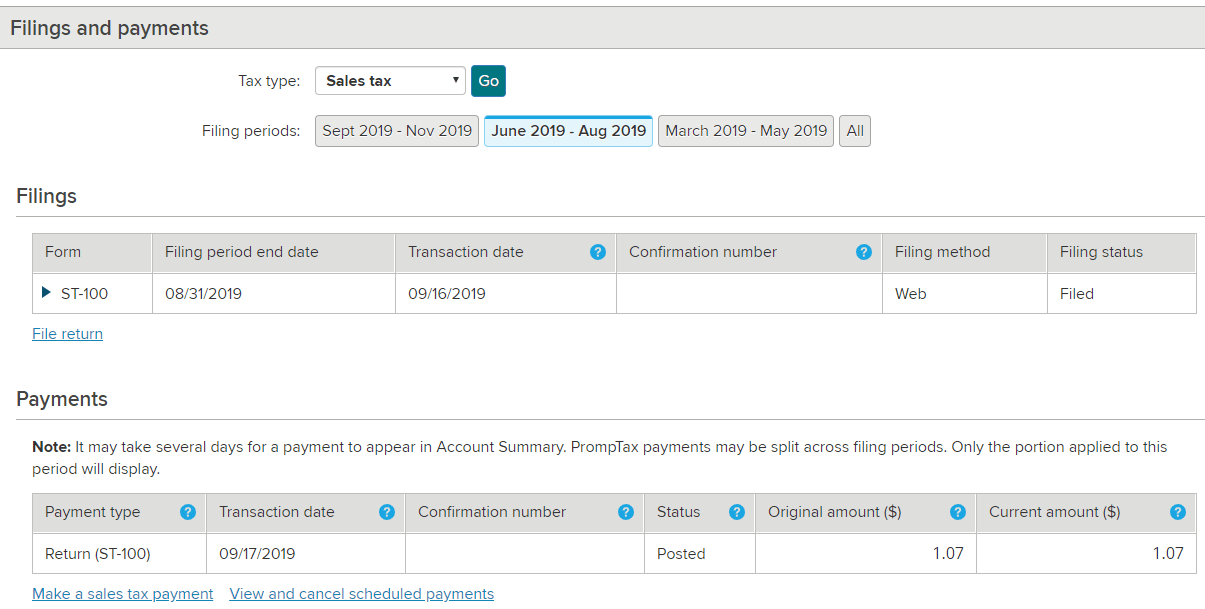
After you file your return, you may choose to make a sales tax payment. Under “Filings and Payments” you can select “Make a sales tax payment.”
Select the filing period the payment is for and then enter the payment amount. Select “Continue” to pay from your bank account.
Once you have made your payment be sure to save/print your confirmation page.
Things to Consider After Filing a Sales Tax Return in New York
There may be no clear way to print your sales tax return and/or payment if you forgot at the time, but there is a way to get the confirmation numbers. Under “Filings and Payments” you can select the filing period you need and the confirmation numbers will be posted for both the return and payments that were made.
How to Get Help Filing a New York Sales Tax Return
Lastly, here is the contact information for the state if case you end up stuck or have questions along the way. You can contact the state of New York directly by phone at (518) 485-2889.
Online options: Register as a sales tax vendor (DTF-17) | Sales Tax Web File
Also see: Sales and use tax | File sales tax returns | Tax Bulletins
If instead, you are looking for a team of experts to handle your sales tax returns for you each month, you should check out our Done-for-You Sales Tax Service. Feel free to contact us if you’re interested in becoming a client!